Code Cruiser
A screen-free educational robot that teaches children coding concepts through color-coded tiles and physical movement, designed to make programming tangible for young learners.
Overview
Code Cruiser is an educational robot designed to teach children valuable coding and logic skills through a completely screen-free approach. In today’s digital era, while it’s crucial to equip children with essential coding skills, jumping directly into digital programming can be overwhelming for young minds. Most children end up wasting hours on screens without developing meaningful problem-solving abilities.
Drawing from Piaget’s theory of development—that direct manipulation of objects supports thought development in young children—Code Cruiser takes a tactile approach. Children create programs by arranging hand-painted color tiles in sequences, which the robot reads using color sensors and then executes as movement commands.
The robot transforms abstract programming concepts like sequences, loops, and conditional logic into physical actions that children can immediately see and understand. By removing the screen barrier, we created a more intuitive learning experience that emphasizes the logical thinking behind programming rather than syntax memorization.
Role & Context
I developed Code Cruiser as part of a three-person team with Trevor McDonald and Ethan Braunstein during the NuVu Studio Spring 2023 Open Innovation program. As one of the primary developers, I focused on the Arduino programming, color sensing algorithms, and motor control systems that bring the educational concept to life.
This project was motivated by the observation that traditional screen-based coding education often fails to engage young learners effectively. We wanted to create something that would make programming concepts tangible and immediately rewarding for children who weren’t ready for text-based coding environments.
Tech Stack
- Microcontroller: Arduino with custom shield integration
- Color Sensing: Adafruit TCS34725 RGB color sensor
- Display: Adafruit SSD1306 OLED (128x32)
- Motor Control: Adafruit Motor Shield v2 with DC motors
- Visual Feedback: Adafruit NeoPixel LED strip
- Fabrication: Laser-cut wooden tiles and holders
- Development Environment: Arduino IDE
- Libraries: Wire, SPI, Adafruit sensor and display libraries
Problem
Traditional coding education for young children faces several critical challenges. Digital interfaces can be overwhelming for developing minds, leading to distraction rather than learning. Children often get caught up exploring the device rather than focusing on programming concepts. Additionally, the abstract nature of code on a screen doesn’t align with how young children naturally learn through physical manipulation and immediate feedback.
Existing educational programming tools either require screens (defeating the tactile learning approach) or oversimplify concepts to the point where children don’t develop genuine logical thinking skills. We needed a solution that would make programming concepts concrete while still teaching real computational thinking.
Design Process
The development of Code Cruiser involved extensive ideation and prototyping to find the right balance between simplicity and educational value.
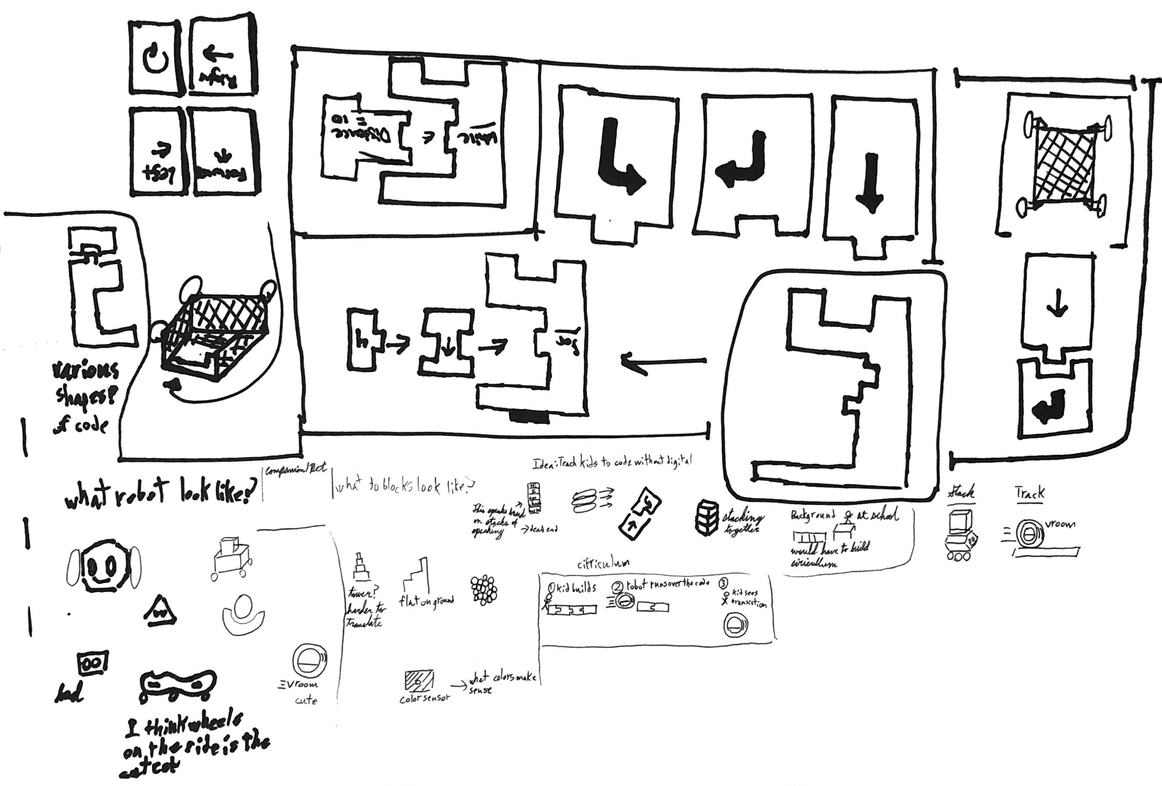
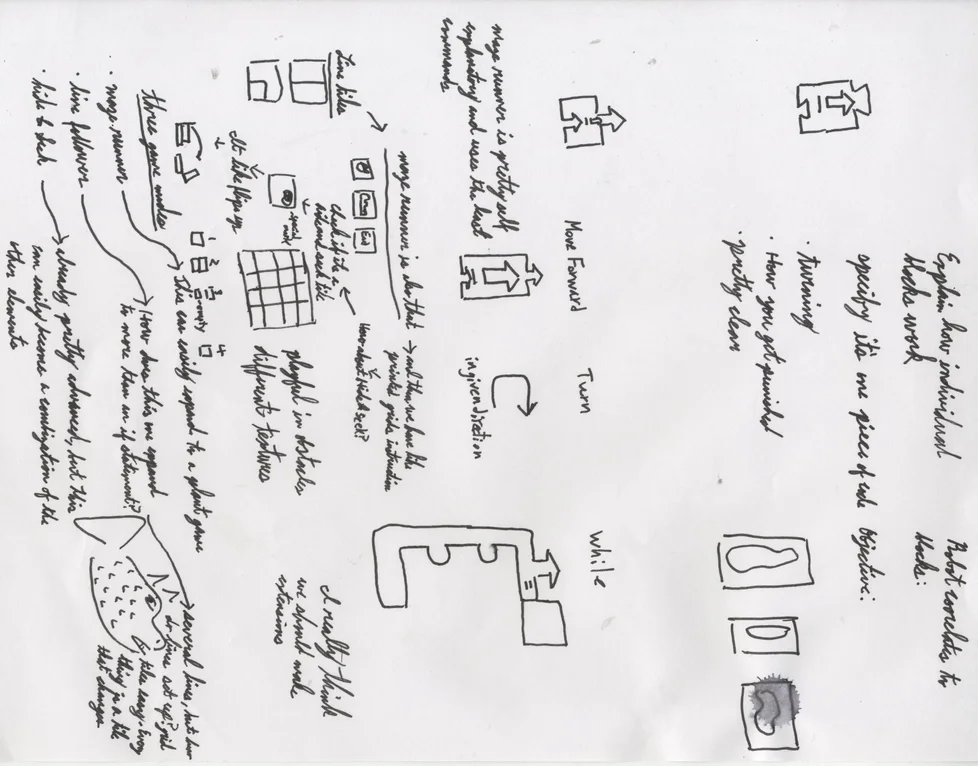
Our initial brainstorming sessions explored multiple approaches to screen-free programming. We considered card-based systems, magnetic tiles, and various robot form factors. The sketches show our exploration of different command structures, from simple directional arrows to more complex programming constructs.
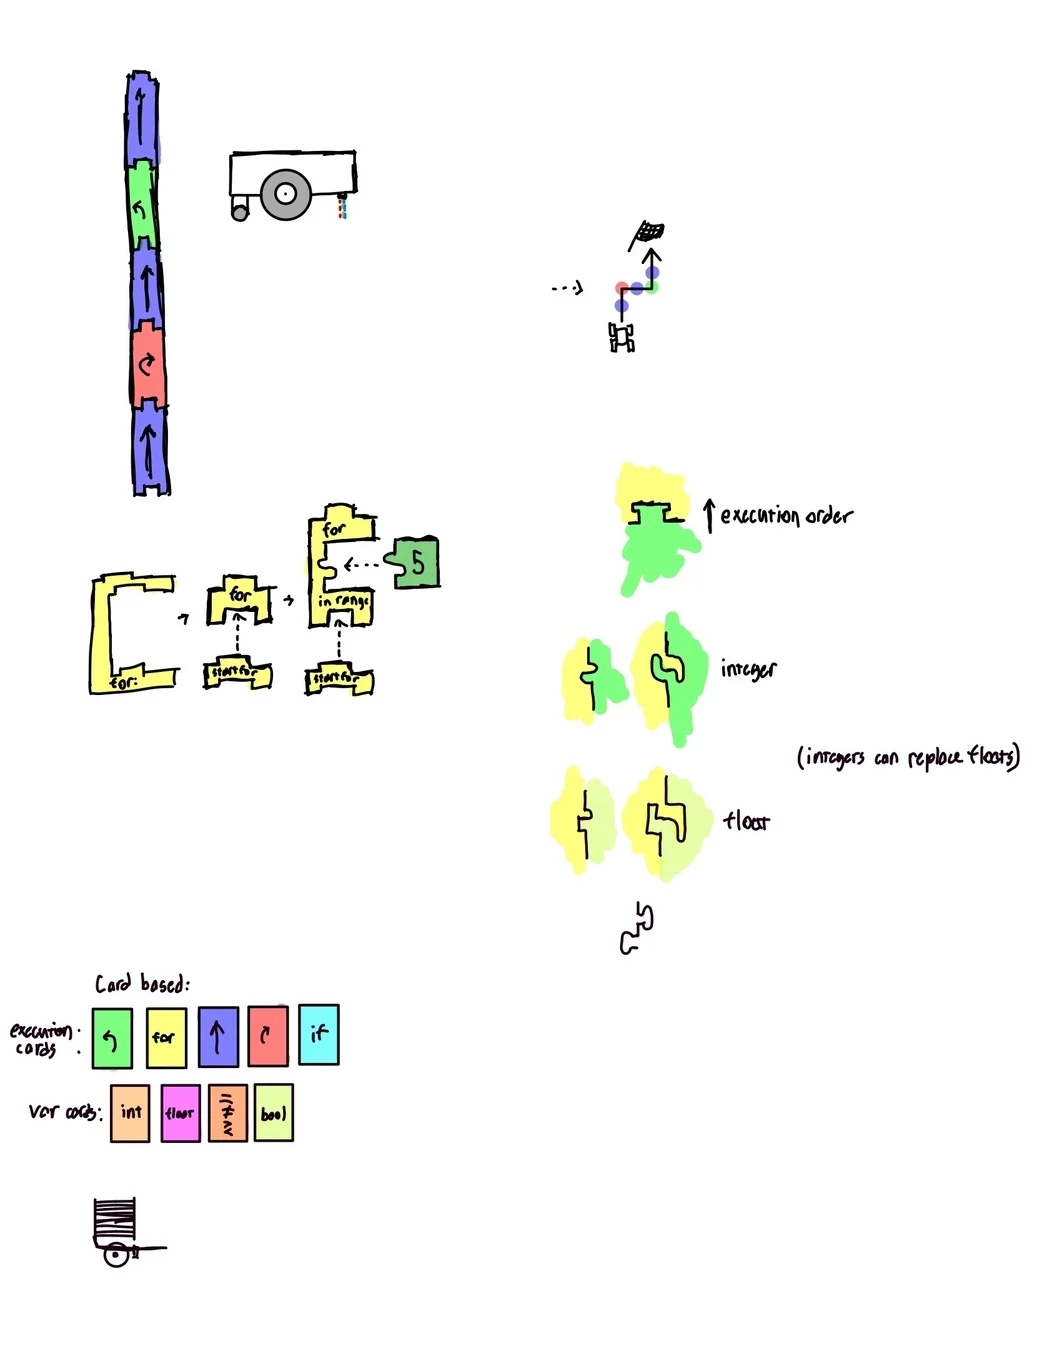
These more detailed sketches helped us work out the technical architecture, including how the robot would read tiles sequentially and translate color combinations into executable commands. The diagrams show our thinking about execution order, loop structures, and the physical interaction model.

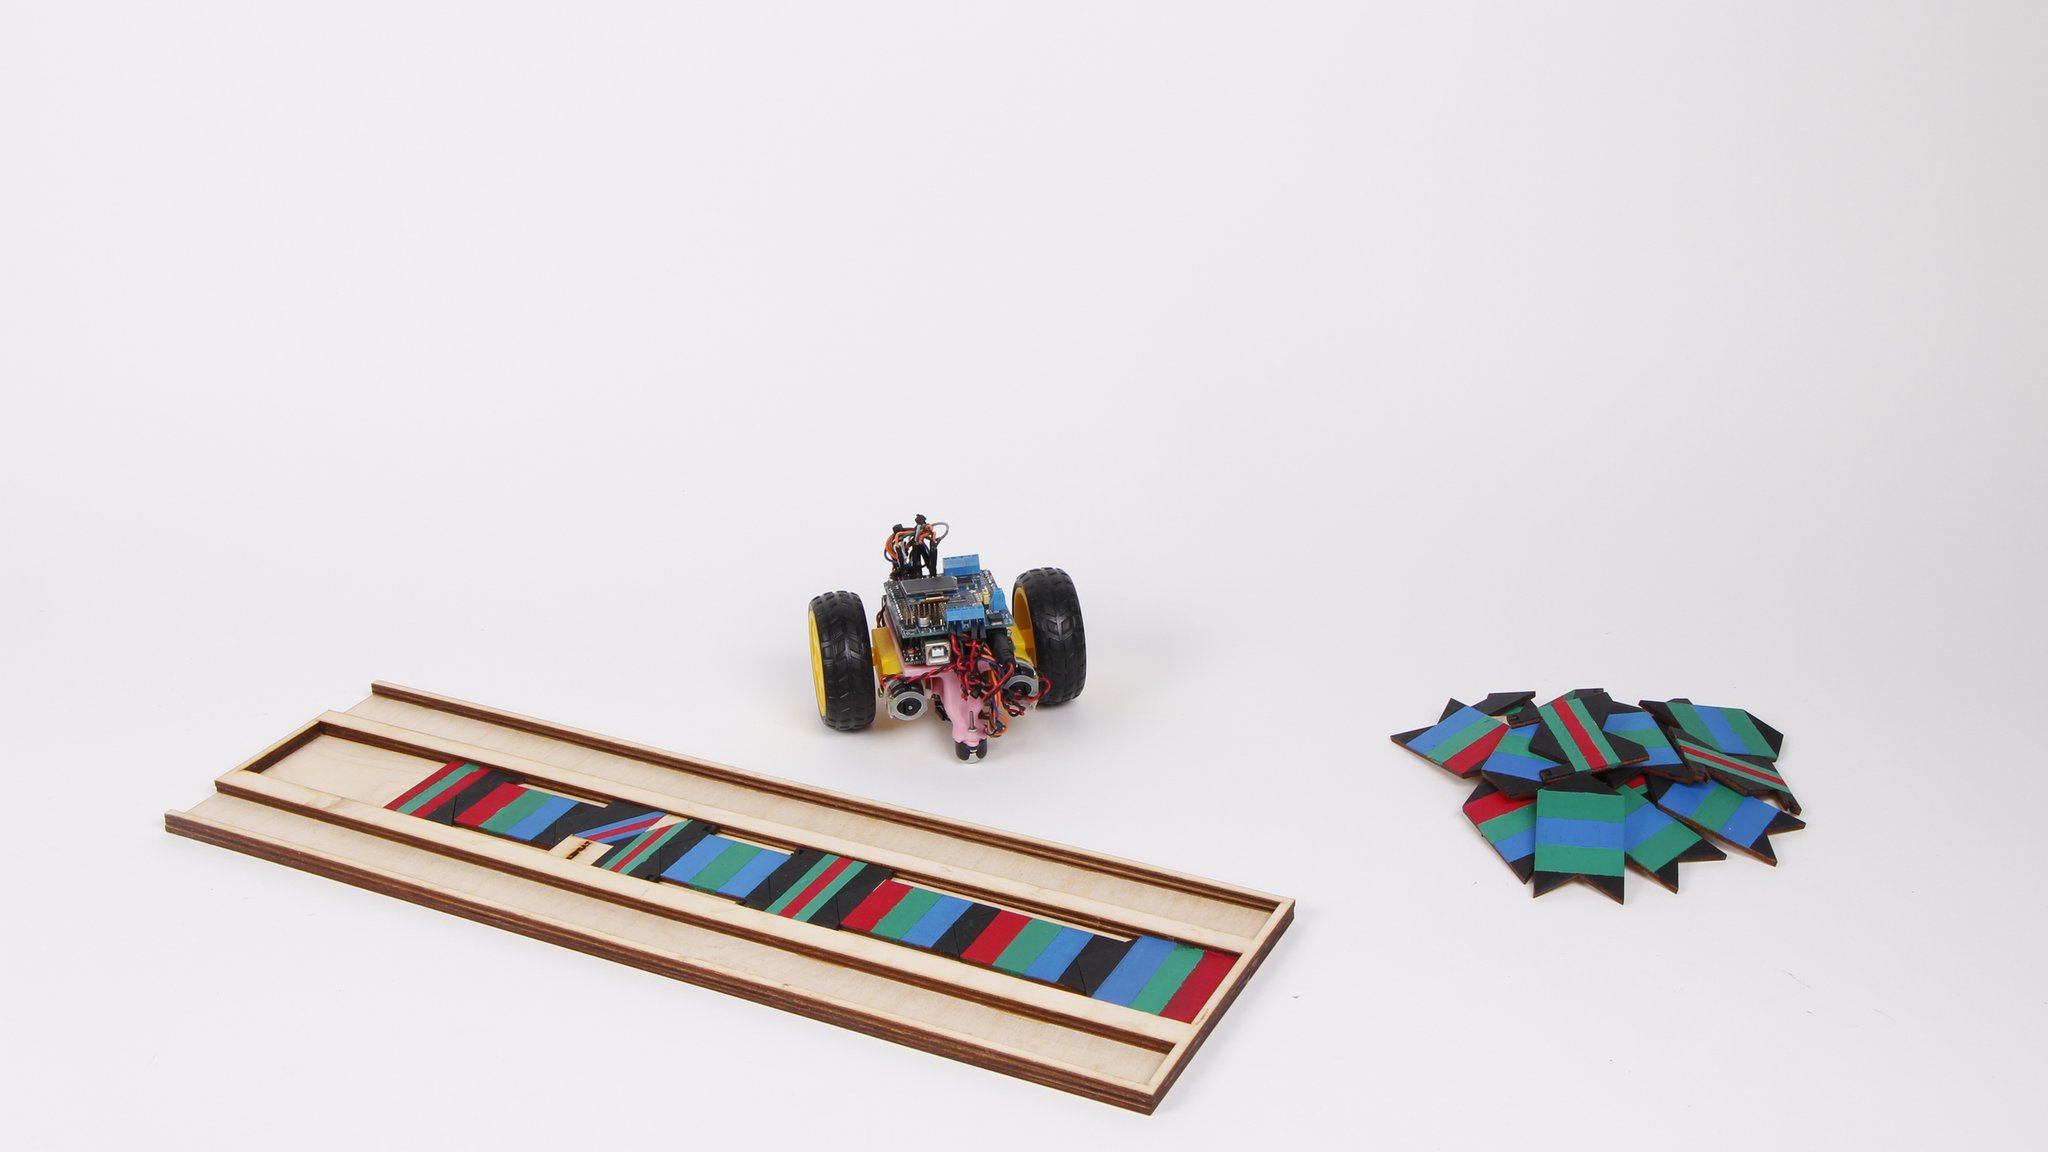
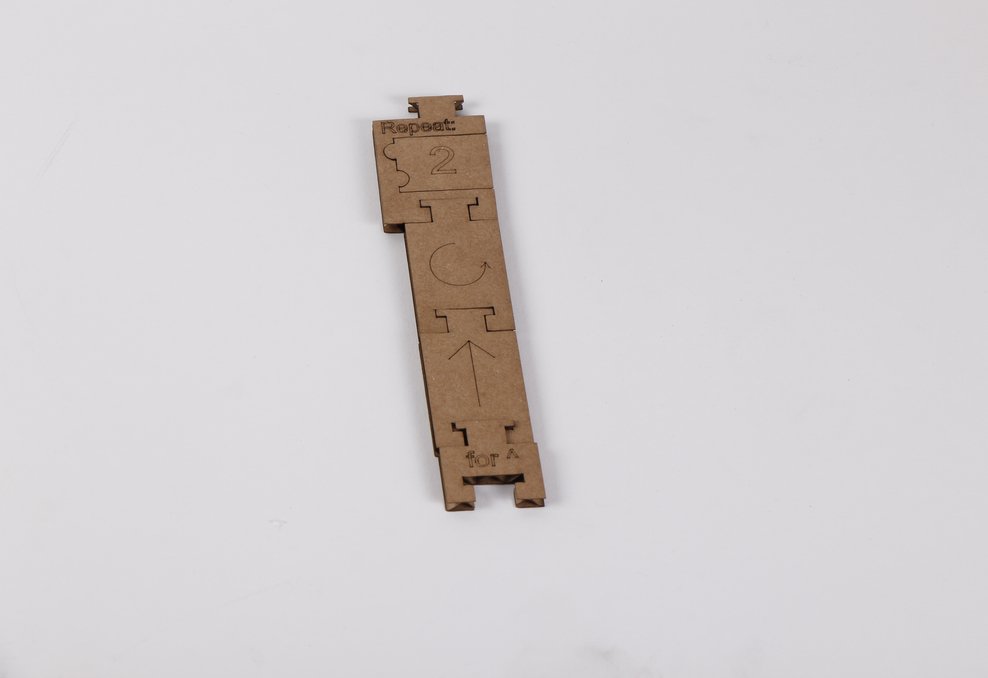
Early prototypes helped us test the core concept using simple materials. This cardboard track system allowed us to validate the color-sensing approach and refine the command vocabulary before investing in more sophisticated fabrication.
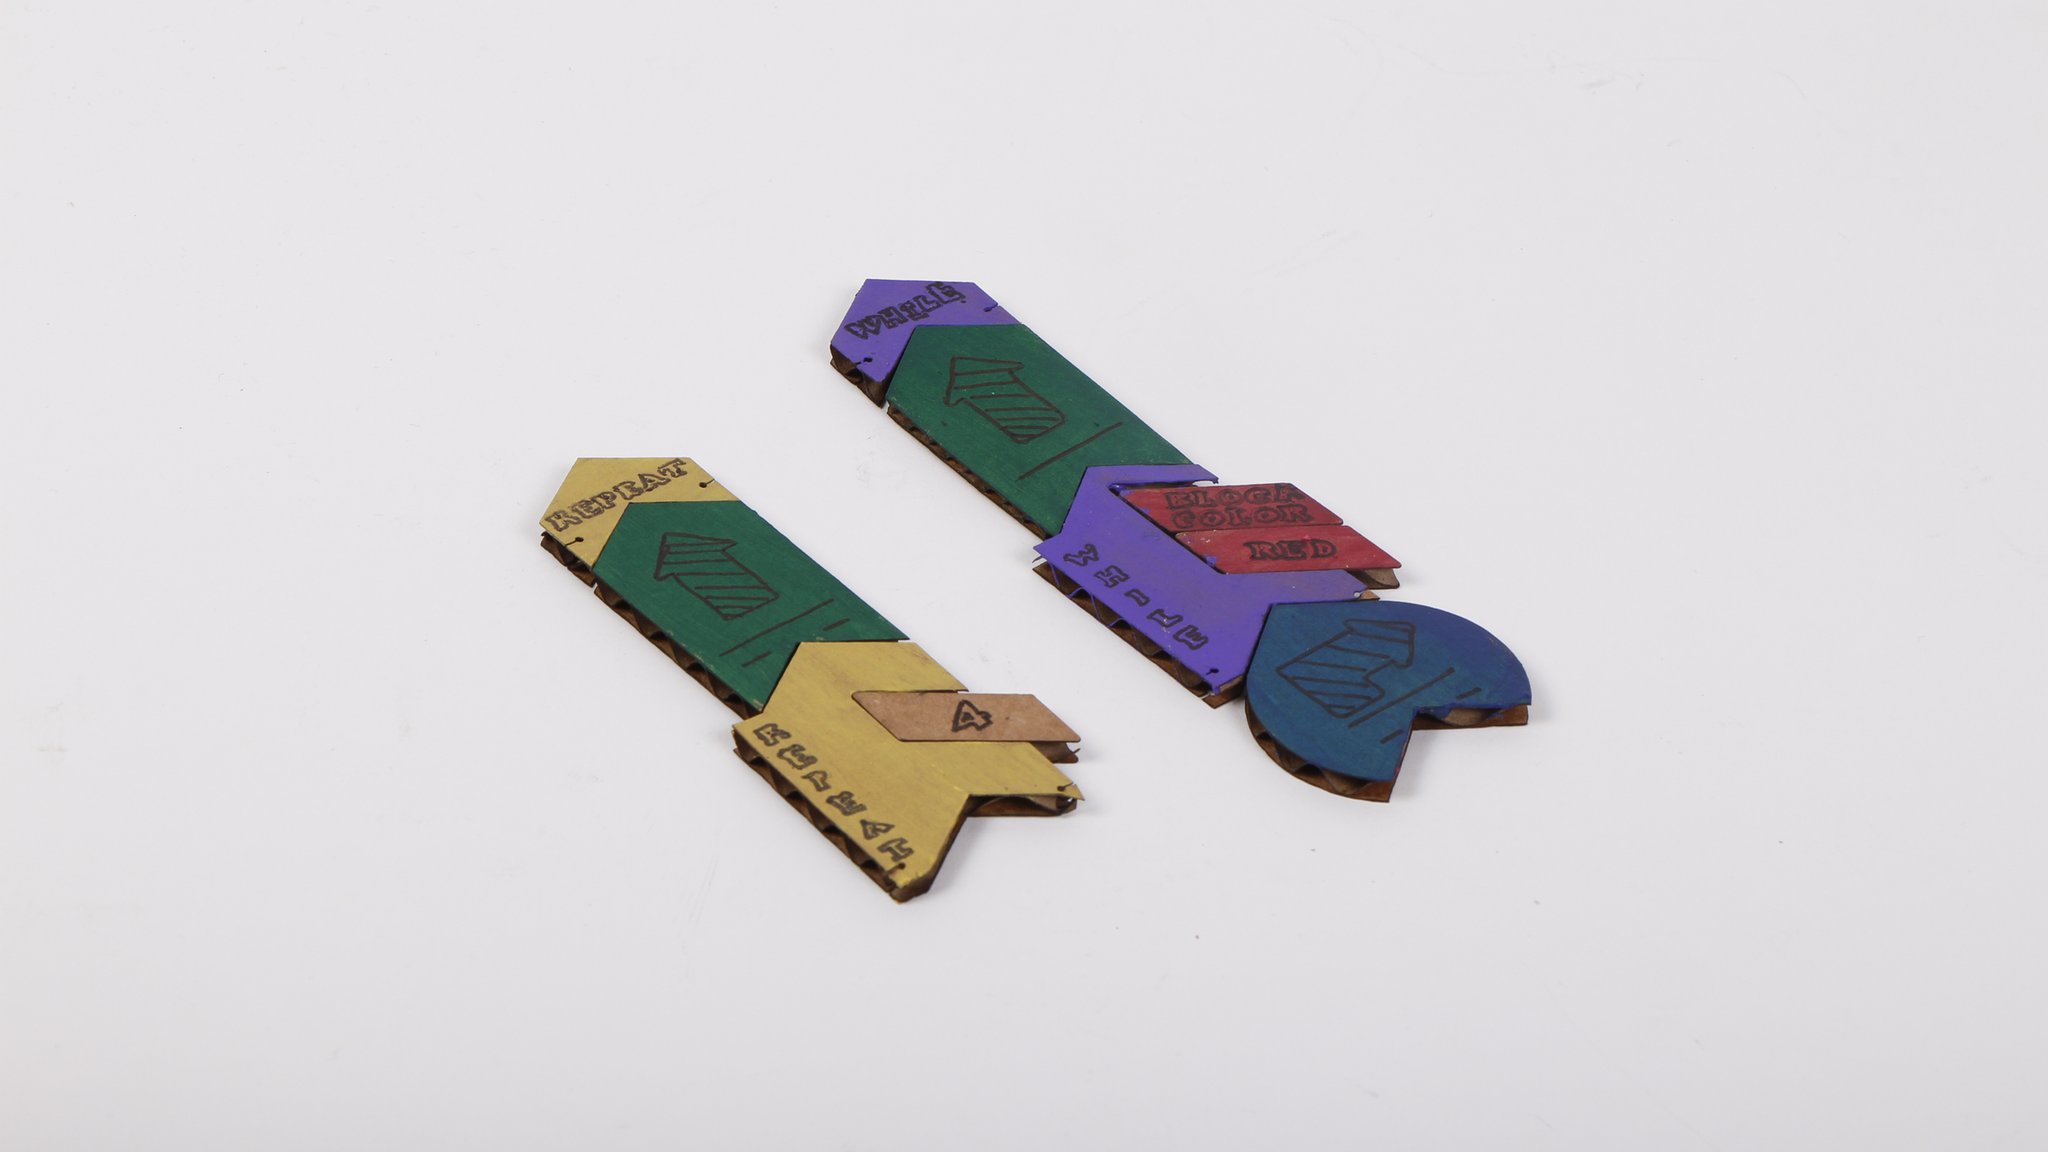
As the system evolved, we developed supporting infrastructure like this laser-cut tile holder that helps organize the programming pieces and makes the system more classroom-friendly. The wooden blocks show our progression toward more durable, child-friendly components.
Approach / Architecture
Code Cruiser uses a tile-based programming system where each command is represented by a unique three-color combination. The robot reads these combinations using a color sensor and translates them into executable commands.
The system architecture centers around a state machine that alternates between “reading” and “executing” modes. During reading mode, the robot scans color tiles and builds a command sequence. When a termination condition is met (like reading a black tile or reaching a sequence limit), it switches to execution mode and performs the programmed actions.
The color sensing system uses differential color analysis rather than absolute values, making it robust to variations in lighting and hand-painted tile inconsistencies. Each color is evaluated relative to the others, and the system calibrates itself on startup to account for ambient lighting conditions.
Key Features
- Screen-free interaction - No digital interface to distract from learning core concepts
- Color-coded programming - Three-color combinations create a rich command vocabulary
- Physical feedback - Robot movement provides immediate, tangible results
- Self-calibrating sensors - Adapts to different lighting conditions and paint variations
- Loop support - Teaches fundamental programming constructs through physical repetition
- Real-time display - Small OLED shows current program sequence as it’s being built
- Robust color detection - Handles hand-painted tiles with varying color intensity
- Modular tile system - Laser-cut wooden pieces that can be rearranged and combined
Technical Details
Hardware Implementation
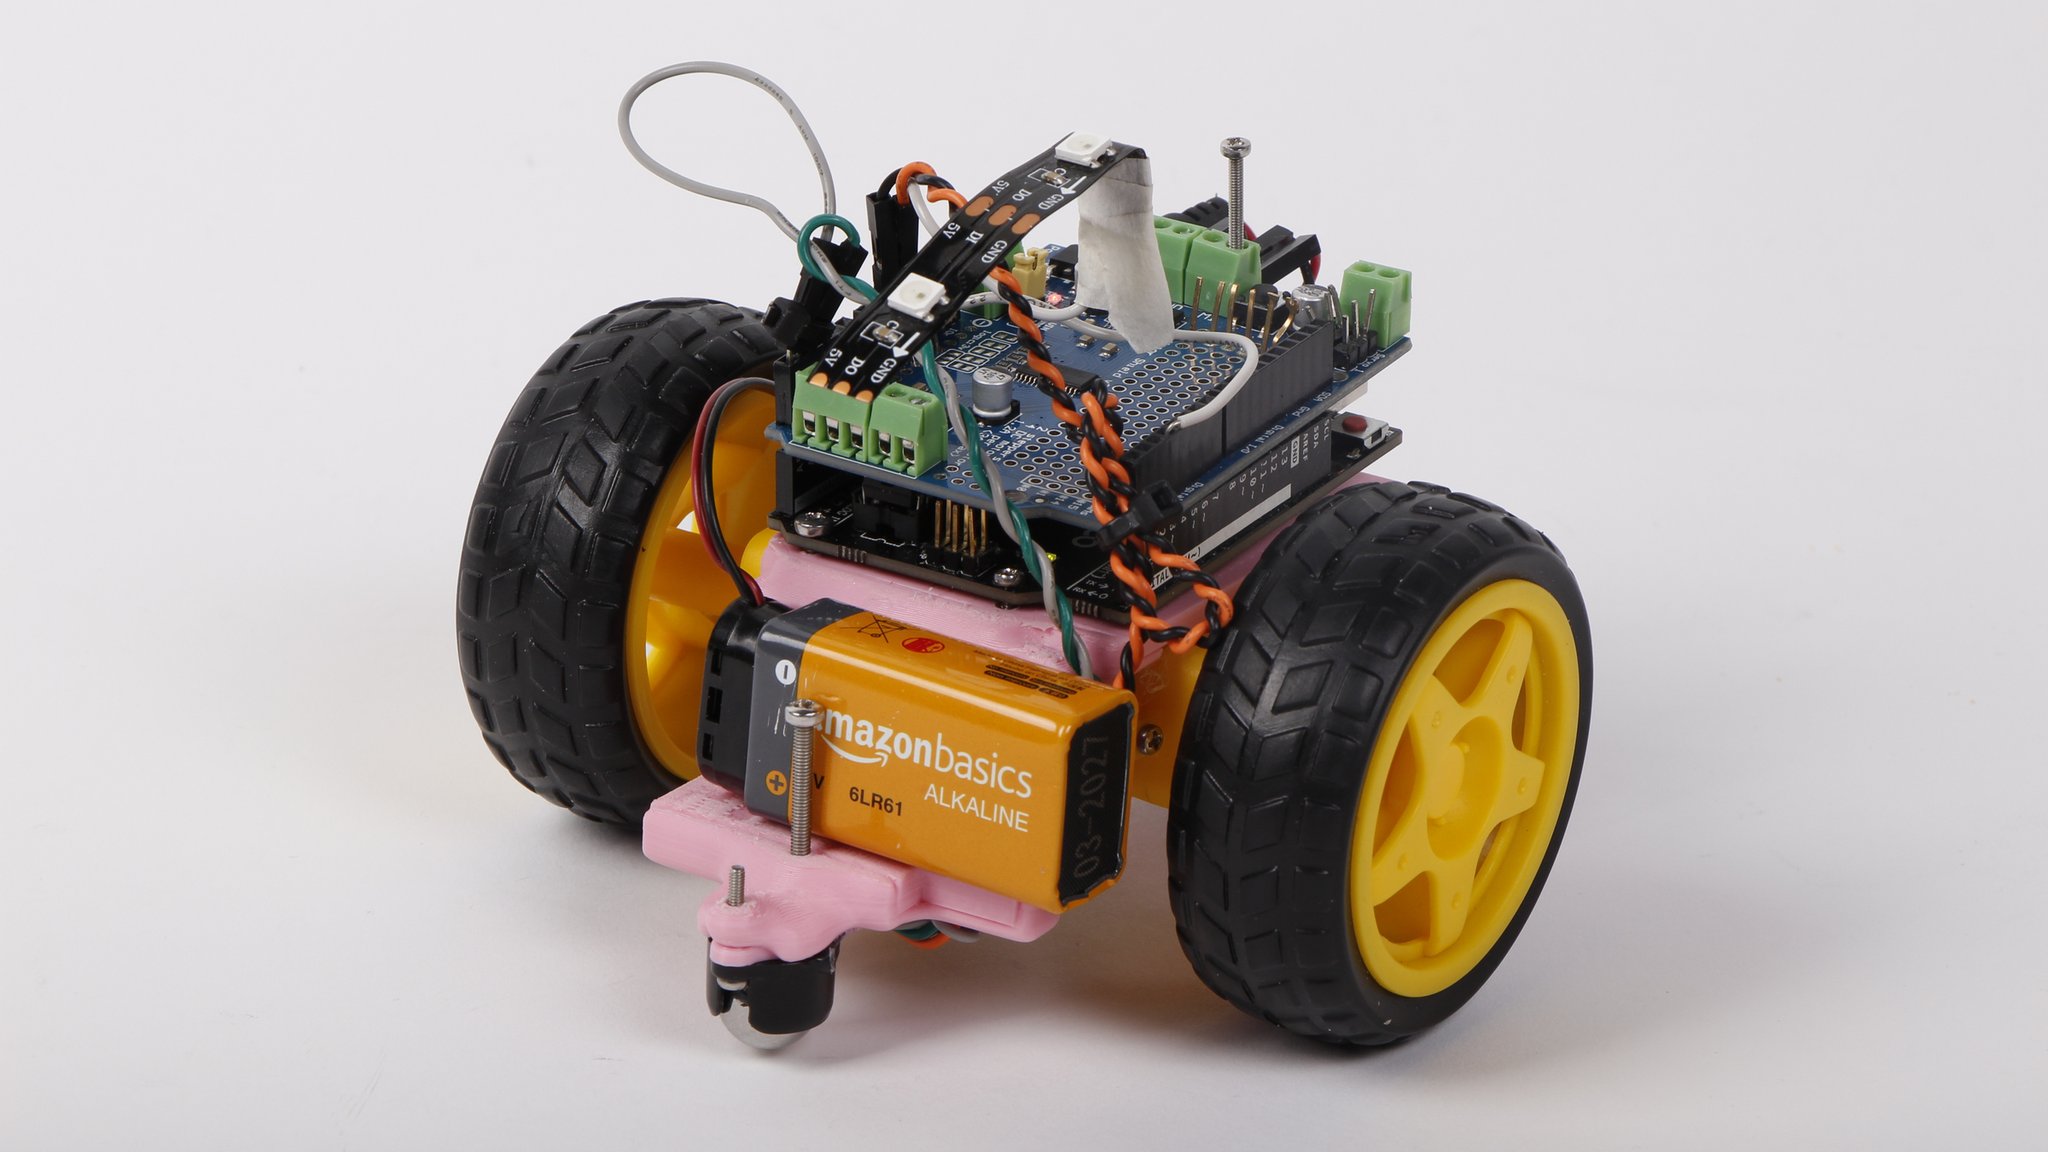
The robot is built on an Arduino platform with a motor shield for driving the wheels. The color sensor is mounted at the front to read tiles as the robot moves over them. A small OLED display provides feedback about the current program state, and NeoPixel LEDs offer additional visual cues.
Color Sensing Algorithm
The core challenge was reliably detecting hand-painted colors under varying lighting conditions. I implemented a differential color analysis system that compares each color channel against the average of the other two:
// Calibrate sensor offset during startup
RedOff = -int(red-(green+blue)/2);
GreenOff = -int(green-(red+blue)/2);
BlueOff = -int(blue-(green+red)/2);

// Apply offset and determine dominant color
blue = blue + BlueOff;
red = red + RedOff;
green = green + GreenOff;

if(red > (green+blue)/2){
    ColorIsGreater(0, red, green, blue); // Red detected
}
else if (green > (red+blue)/2){
    ColorIsGreater(1, red, green, blue); // Green detected
}
else if (blue > (red+green)/2){
    ColorIsGreater(2, red, green, blue); // Blue detected
}
This approach proved much more reliable than absolute thresholds, especially with the inconsistencies inherent in hand-painted tiles.
Physical Programming Interface
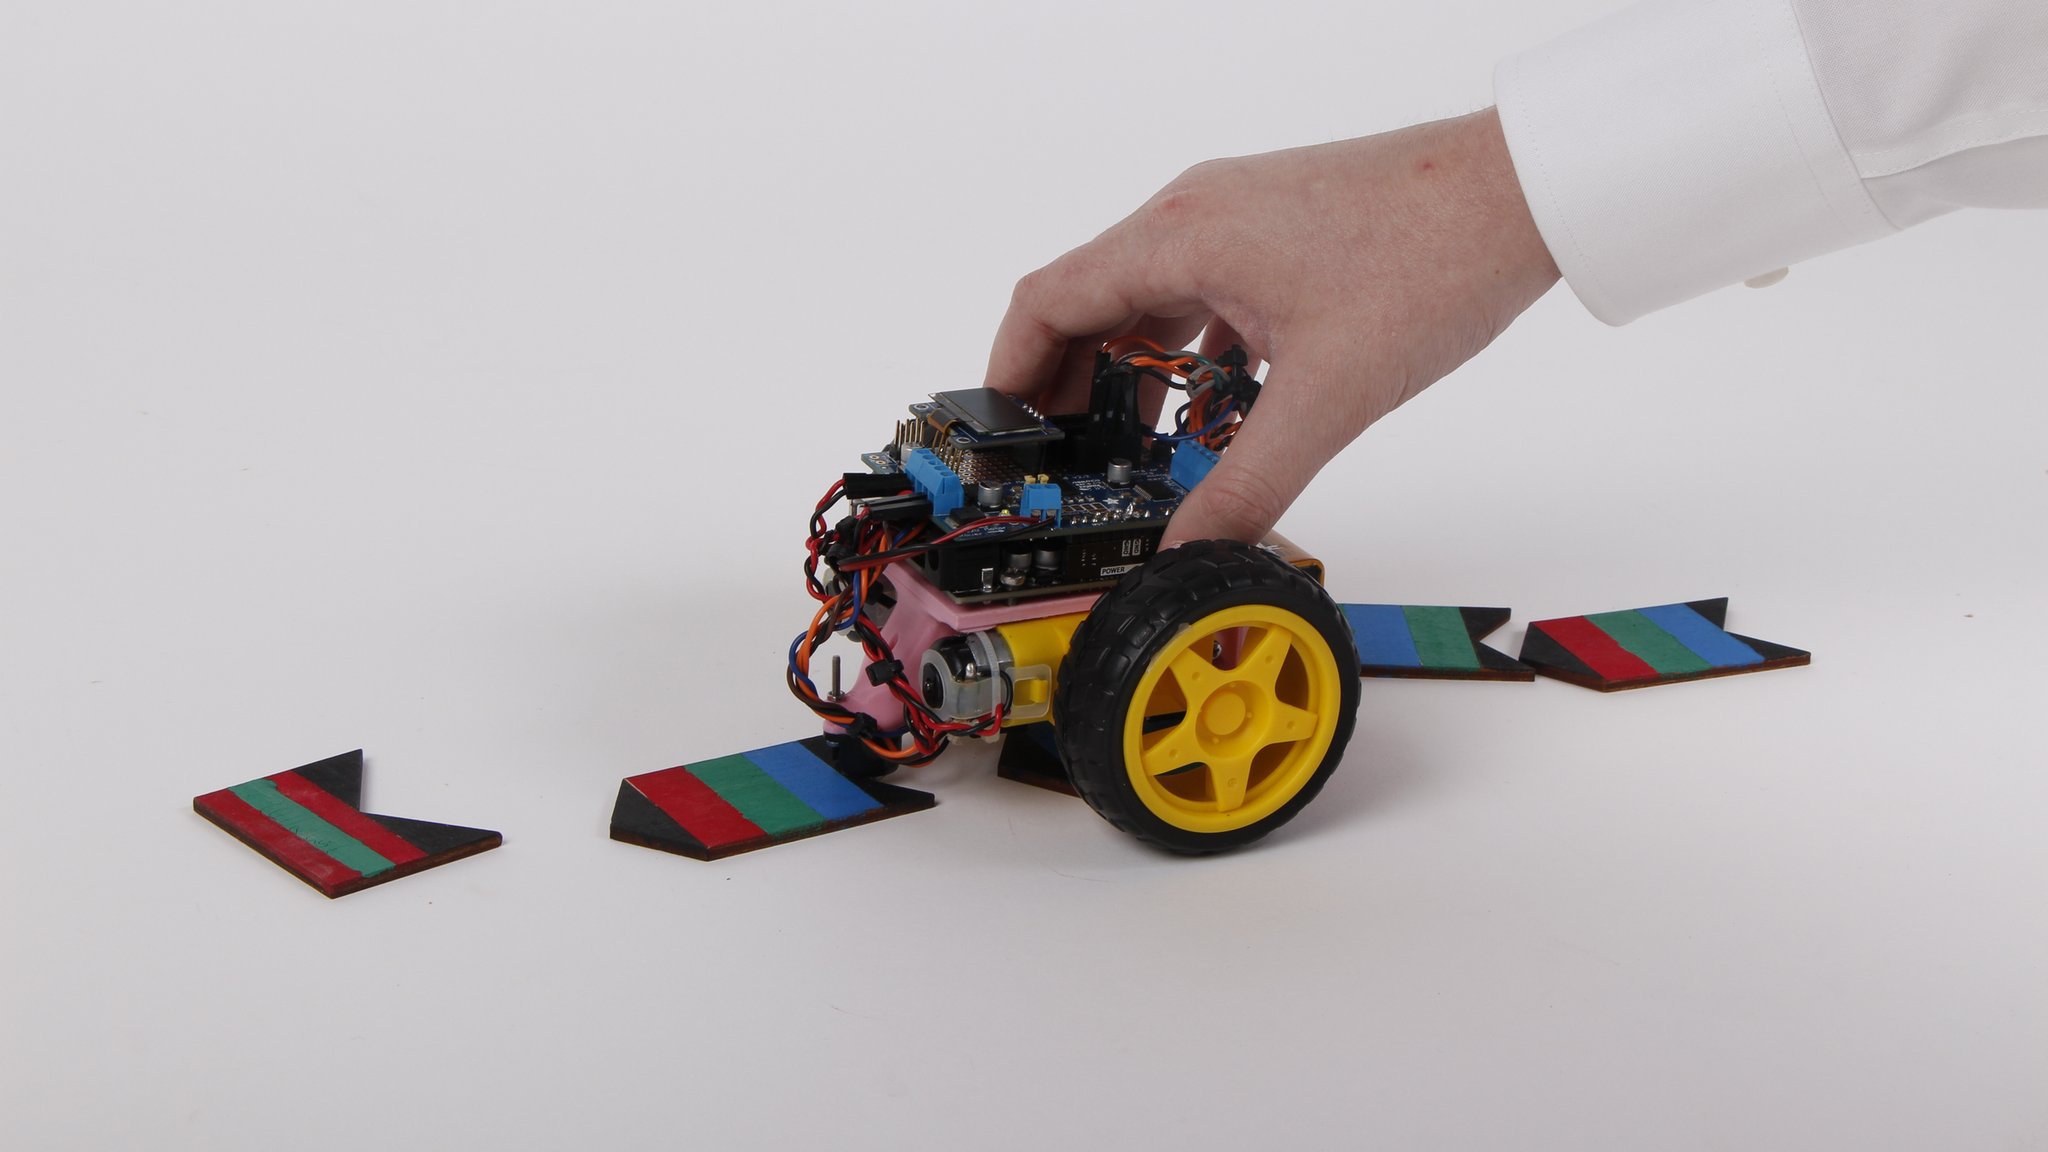
The programming tiles are laser-cut from wood and hand-painted with acrylic paints. Each tile contains three colored sections that encode a specific command. The physical nature of the tiles makes the programming process tangible and allows children to see their entire program laid out spatially.
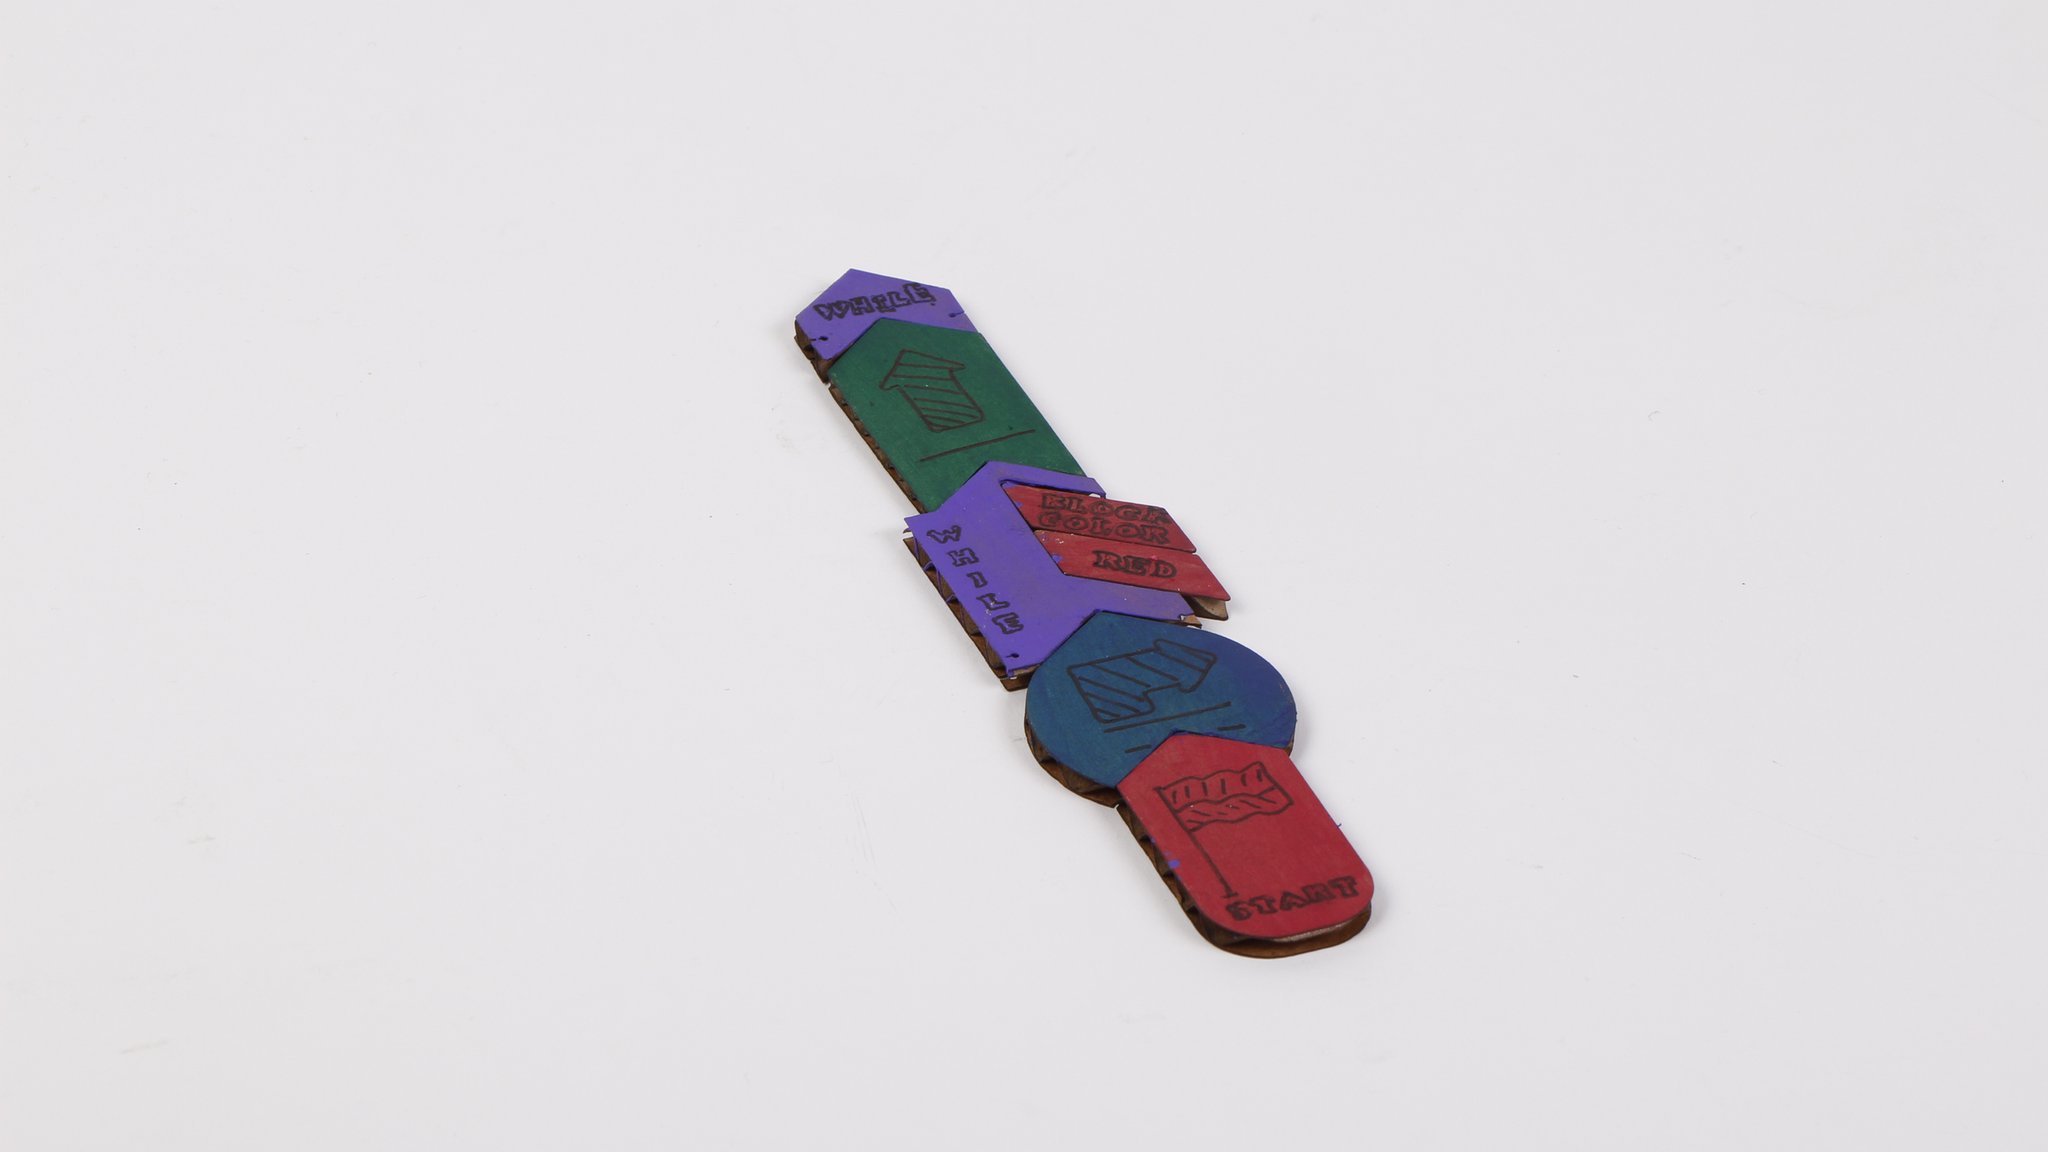
Different tile arrangements create different programs. Children can experiment with sequences, create loops, and debug their programs by physically rearranging the tiles.
Iterative Development
Our development process involved multiple iterations, moving from cardboard prototypes to more refined wooden components. Each iteration taught us something new about durability, usability, and the educational effectiveness of different approaches.

We experimented with different physical layouts, including this track-based approach where tiles are arranged in a linear sequence. This helped us understand how children naturally think about program flow and sequence.
Command Encoding System
Commands are encoded using a base-3 system where each tile represents a three-digit number in base 3:
tiles[tileSequenceLength] = colors[0] + colors[1]*3 + colors[2]*9;This creates 27 possible unique commands (0-26), giving us plenty of room for different movement commands, control structures, and special functions. Key mappings include:
- Tile 5: Forward movement
- Tile 23: Turn right
- Tile 16: Turn left
- Tile 10: Loop start/end marker
State Machine Implementation
The robot operates in two primary states managed by a boolean flag:
if(Reading){
    // Scan for color tiles and build command sequence
    // Display current program on OLED
} else {
    // Execute stored command sequence
    // Handle loop constructs and motor control
}
Loop Handling
One of the more sophisticated features is loop support. When the system encounters a loop marker (tile 10), it identifies the loop boundaries and executes the enclosed commands multiple times:
if(tiles[i] == 10){
    int loopClosed = -1;
    for(int j = i; j < tileSequenceLength; j++){
        if(tiles[j] == 10 && loopClosed == -1){
            loopClosed = j;
        }
    }
    // Execute loop contents twice
    for(int j = 0; j < 2; j++){
        for(int g = i; g < loopClosed; g++){
            execute(tiles[g]);
        }
    }
}
Results
Code Cruiser was successfully completed and presented at the 2023 NuVu Open Innovation Symposium. The project demonstrated that screen-free programming education is not only possible but can be more engaging for young learners than traditional approaches.
The robot successfully interpreted hand-painted color tiles with high reliability, even accounting for variations in paint application and lighting conditions. The differential color sensing approach proved robust enough for real-world use by children.
At the symposium, the project received positive feedback from educators and parents who appreciated the tactile learning approach. The immediate physical feedback from robot movement helped children understand cause-and-effect relationships in programming more intuitively than screen-based alternatives.
The modular tile system proved particularly effective, allowing children to experiment with different program structures and immediately see the results of their changes.
Lessons Learned
Color sensing is harder than it looks. Initial attempts using absolute color thresholds failed completely with hand-painted tiles. The differential analysis approach was crucial for handling real-world color variations and lighting conditions.
Physical feedback is powerful. Watching the robot execute their programs gave children an immediate understanding of sequence, logic, and debugging that’s harder to achieve with screen-based tools.
Calibration is essential. The startup calibration routine that measures ambient lighting conditions was critical for reliable operation across different environments.
Simple can be sophisticated. While the tile system appears simple, the three-color encoding scheme provides enough complexity to teach genuine programming concepts including loops and conditional logic.
Hardware integration matters. Combining multiple sensors, displays, and motor controls required careful attention to power management, timing, and I2C communication to avoid conflicts.
Fabrication quality affects usability. The laser-cut wooden tiles and holder significantly improved the user experience compared to our cardboard prototypes, making the system more durable and classroom-ready.
Iteration is key. Each prototype taught us something new about both the technical implementation and the educational effectiveness. The progression from sketches to cardboard to wood showed the value of rapid prototyping.
Links
- Project Repository: [Available upon request - NuVu Studio project]
- NuVu Studio: 2023 Open Innovation Program
- Presentation: Showcased at 2023 OI Symposium